
이번에는 쿠키와 세션에 서버 데이터를 담아 전달하는 방법에 대해 알아보겠습니다.
1. 개념 : 쿠키와 세션 모두 사용자의 데이터를 담을 수 있습니다. 하지만 가장 큰 차이점은
쿠키는 클라이언트에 쿠키가 저장이 되어 보안에 취약합니다.
세션은 서버에 저장되어 쿠키에 비해 보안적으로 안전합니다.
1. 쿠키 저장해 보기
// http 모듈 import
const http = require('http');
// 미리 생성한 html 파일을 읽기 위한 fs 모듈 임포트
const fs = require('fs');
const server = http.createServer((req, res) => { // req : 요청, res : 응답
// 쿠키를 지정 : 키 = 값 형식으로 ; 를 기준으로 설정
res.writeHead(200, {'Set-Cookie' : 'mycookie=value1'});
res.writeHead(200, {'Set-Cookie' : 'mycookie2=value2'});
res.end('cookie save test');
});
server.listen(8081, () => {
console.log('8081 server is lisening');
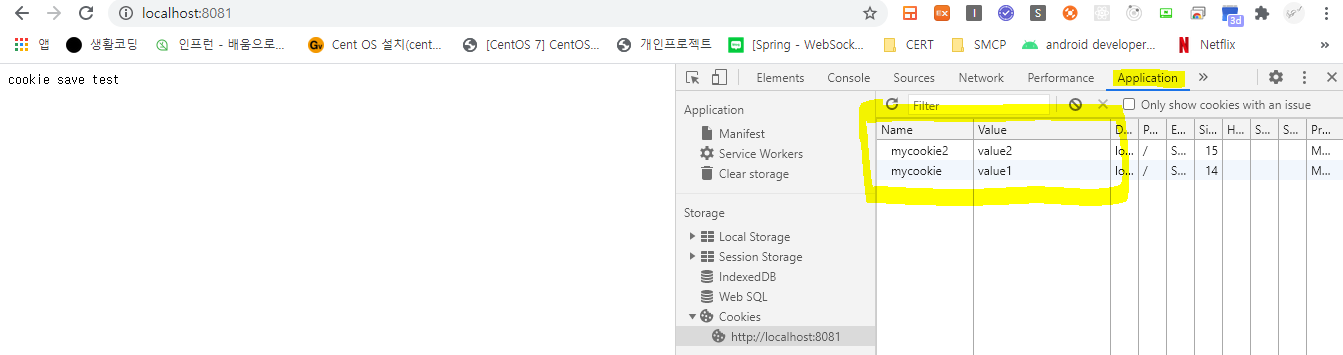
});node app.js 로 서버 실행 후 http://localhost:8081/ 로 브라우저를 열고 F12 개발자 도구를 켠 다음 'application'탭을 보면 설정한 쿠키값들이 보임을 알 수 있다.
mycookie = value1
mycookie2 = value2
이번엔 쿠키를 이용해 간단한 로그인을 구현해 보도록 하겠다.
로그인 페이지에서 입력한 사용자의 이름을 쿠키에 name=hyr 처럼 저장한 후 쿠키값이 있을 경우 hyr님 반갑습니다.를 응답한다.
<app.js>
// http 모듈 import
const http = require('http');
// 미리 생성한 html 파일을 읽기 위한 fs 모듈 임포트
const fs = require('fs');
const url = require('url');
const qs = require('querystring');

// 쿠키 파싱 함수
const parseCookies = (cookie = '') => {
    // cookie => mycookie=value1;mycookie2=value2

    // eachCookies = [mycookie=value1, mycookie2=value2]
    let eachCookies = cookie.split(';');
    // [ [mycookie, value1], [mycookie2, value2] ]
    return eachCookies.map(e => e.split('='))
                      .reduce((acc, [key, val]) => { // acc : 누적
                          acc[key.trim()] = decodeURIComponent(val); // acc에 동적으로 key값에 value추가
                          return acc;
                      }, {});
}

const server = http.createServer((req, res) => { // req : 요청, res : 응답
    // 쿠키 접근(req.headers.cookie)
    console.log(req.headers.cookie); // 문자열이기 때문에 파싱이 필요

    // 쿠키 파싱 함수를 통해 쿠키객체 얻어옴
    const cookies = parseCookies(req.headers.cookie);

    // req.url > 요청한 url 주소가 담겨있다.
    if(req.url.startsWith('/login')){ // /login으로 시작하는 url요청일 경우
        // http://localhost:8081/login?name=sooingkr 에서 ?name=sooingkr 부분인 쿼리스트링 부분을 가져온다.
        // 해당 정보가 객체로 query에 들어오게 됨
        const { query } = url.parse(req.url);
        const { name } = qs.parse(query); // querystring 모듈로 name값을 파싱함

        // 저장할 쿠키 데이터의 유효시간을 지정하기 위함
        const expires = new Date();
        expires.setMinutes(expires.getMinutes() + 5); // 제한 시간 설정
        res.writeHead(302, // 302 코드 > redirection코드로 Location에 지정한 곳으로 리다이렉션한다.
            {
                Location : '/',
                // expire 유효시간 Http통신 요청만 가능, / 요청에 대해서만 등 다양한 옵션을 설정할 수 있다.
                'Set-Cookie' : `name=${encodeURIComponent(name)}; Expires=${expires.toGMTString()}; HttpOnly; Path=/`
            }
        );

        res.end('<p>end</p>'); // 요청 응답 끝
    } else if(cookies.name) { // 로그인을 통해 쿠키에 name값이 존재하면

        res.writeHead(200, {'Content-Type':'text/html; charset=utf-8'});
        // 쿠키에 저장된 name값을 응답
        res.end(`${cookies.name}님 안녕하세요`);
    } else { // 로그인 페이지
        // 로그인 페이지 html 을 읽어 로그인 페이지로 이동
        fs.readFile('./server2.html', (err,data) => {
            res.end(data);
        });
    }
});

server.listen(8081, () => {
    console.log('8081 server is lisening');
});
<server2.html>
<!DOCTYPE html>
<html lang="en">
<head>
<meta charset="UTF-8">
<meta name="viewport" content="width=device-width, initial-scale=1.0">
<title>로그인 페이지</title>
</head>
<body>
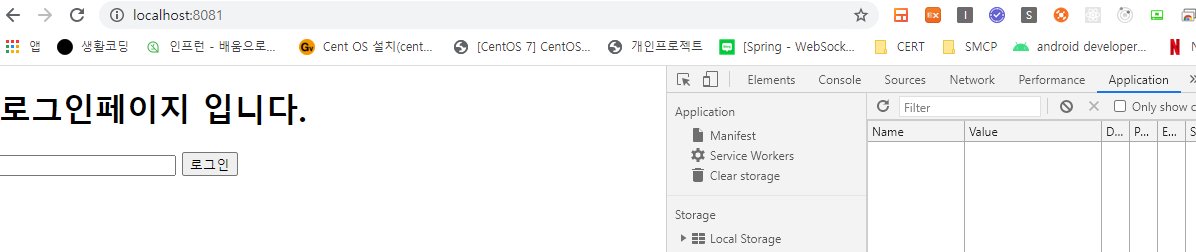
<h1>로그인페이지 입니다.</h1>
<form action="/login" method="GET">
<input type="text" id="name" name="name" />
<button type="submit">로그인</button>
</form>
</body>
</html><결과>
로그인 페이지(server2.html)
로그인 후 화면

세션은 다음 페이지에서 이어 설명하도록 하겠습니다.
'스터디 > Node.js' 카테고리의 다른 글
| 3. 쿠키와 세션에 서버 데이터 담아 전달하기(2) - 세션(Session)편 (0) | 2020.09.14 |
|---|---|
| 1. util모듈을 이용한 node.js 서버 구성하기(1) (0) | 2020.09.14 |